
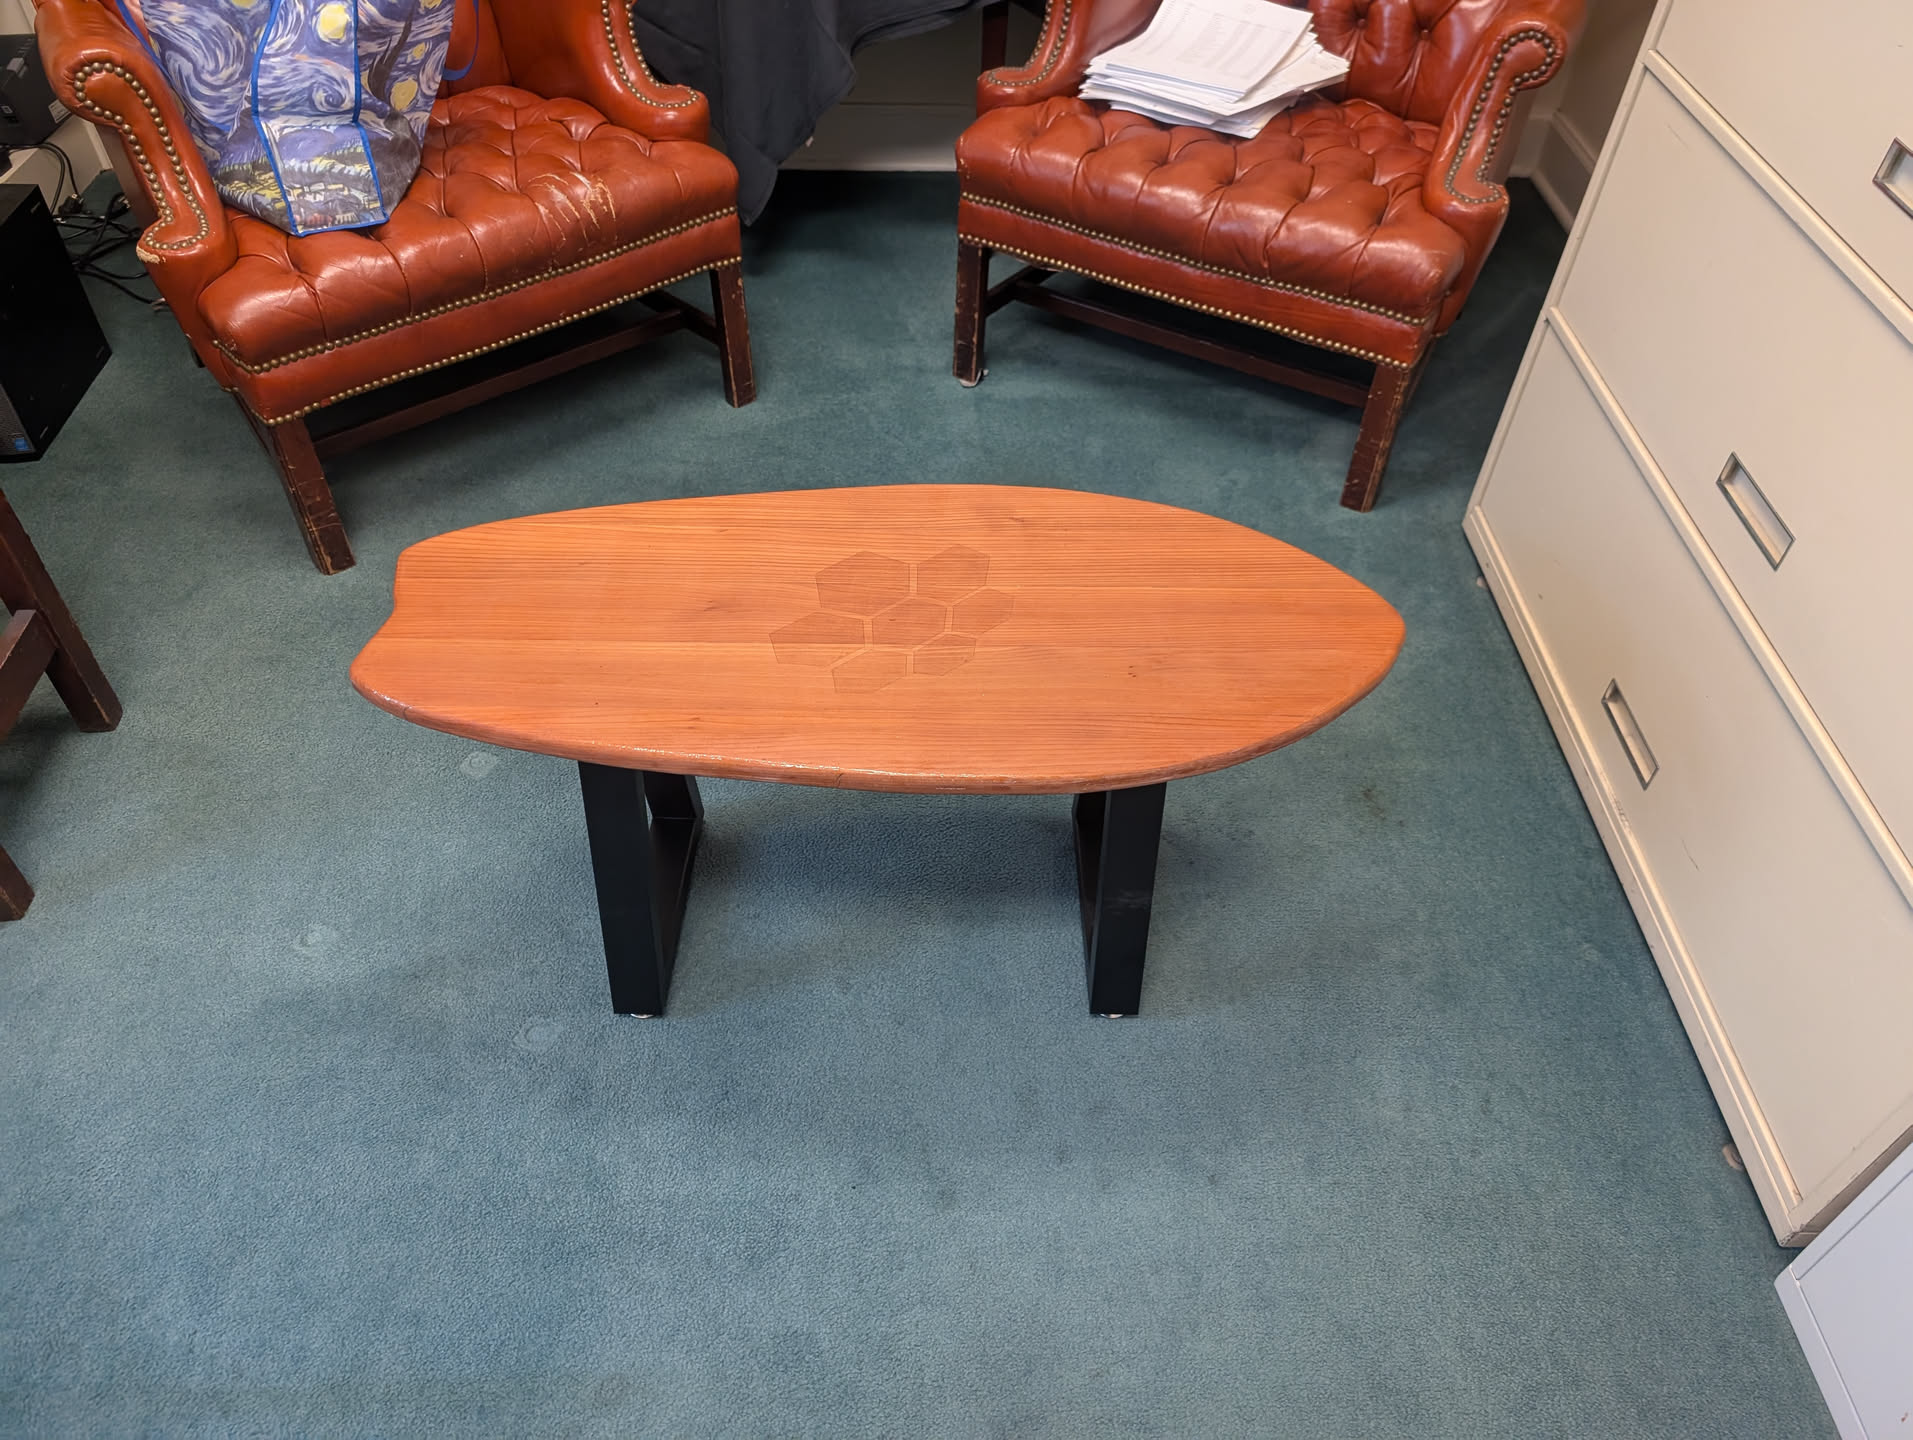
Surfboard Coffee Table
I had some extra redwood from the Flag Display. It was maybe 8 inches wide, 3.5 inches thick, and 3 feet long. While the heroes at IsGood Woodworks were ripping the slab down, I had him slice off 1 inch segments. Those were then planed down to around 3/4 inch thick.
 I took those, and glued them together. I only had two clamps long enough, so I knew that there would be some warping. Luckily it wasn’t too bad.
 Next came the sanding. This wasn’t particularly difficult, or even time consuming. The issue was that I’d end up doing this a lot on this project. The bag on the end is on purpose. I knew that I had some gaps, so I mixed the sawdust with some wood glue as a perfect wood filler.
This is a great protip, because store bought wood filler doesn’t always match the wood. In this case, the filler literally contains the wood. Some woodworkers keep jars of different types of wood saw dust, just for this.
Anyway, I sanded it to 120.
 This is redwood from Santa Cruz, the surf capital of the world. Or the US. Or California. Whatever. Lots of people surf there. So that was my inspiration. I made a quick surfboard shape in Inkscape, and printed it out. I taped the sheets together and traced them on the wood. I would have liked to have used more of the wood, but then it looked weird.
 Next, I used a jigsaw to cut it out. I must say, out of all my tools, my cheap Black and Decker jig saw that I’ve had for like 20 years gets so much use and it’s still plugging along.
Anyway, I also used a roundover pit all around the edge, on both sides.
Then more sanding. I got it to 220.
 I knew that I wanted my logo to be stained, but I also know that stain isn’t great with stencils. It tends to bleed. On some scrap, I tried a few different techniques. I found that out of all of them, only two seemed to have any affect. First, I cut along the edge of the stencil, severing the top layer of wood fibers. I’m so glad my logo is straight lines. Two, you want to pat the stain on instead of rubbing it, and whatever you’re using to apply the stain, you want it to have very little stain on it. Almost dry.
In my case, I read that makeup applicator sponges work really well for this. I don’t wear makeup and neither does my girlfriend. I didn’t want to spend all of $5 to get 500 of them, so I asked my coworker if I could have one of hers.
Then I took a deep breath, very gently patted the stain on, and hoped for the best.
 Oh my Keanu, that turned out well. If you look very closely, you can see the cut marks, where I went too far, but from anything more than like a foot away, it looks amazing.
 Now for the painful process of varnishing. This process took entirely way too long, because I kept screwing it up. I’m using spar urethane varnish. The spar is waterproof, which is cool, but most importantly, it has UV protection. This table is going to be in my office, with western facing windows, so I don’t want the wood to change color over time.
Also I already had the spar varnish.
With a high quality synthetic brush, apply the varnish with the grain. Do this outside. The fumes are super duper toxic. The spar self levels for the most part. Its better to do multiple thin layers, than fewer thick layers.
 I did 3 layers, and then sanded some more. I ran into an issue here. So as the varnish was drying, it dripped down the sides. Since those drips were thicker than the varnish normally is, they didn’t cure properly. When I tried to sand them out, I got into the gunk, and cleverly spread that goo all over the table.
I tried putting another layer of varnish on top of it, under the delusional belief that it would somehow blend or something.
I was wrong. Yay more sanding. I sanded all the gunk off.
 All right. Let’s try this again. More varnish.
More sanding.
I got to 600 grit. It was smooth. It looked amazing. I was almost proud of myself.
I wiped it down with acetone to remove the sanding dust. I was so happy this project was done.
 Did you know that acetone eats away at varnish? I didn’t. See, on the boat, we frequently wipe everything down with acetone before painting. But the boat is fiberglass. And the table is not.
Fuck. My. Life.
More sanding. A lot more. The acetone ate through at least 2 layers of varnish, so I had to sand almost to pure wood.
Back to adding more varnish.
 After roughly 5 layers of varnish on both sides and the edges, I sanded it all the way to 3000 grit.
This is where I reached my patented “close enough” stage I reach in every project.
 Visually, you can still see hills and valleys in the varnish. It’s smooth. But some areas are glossier than others. But I was tired of fighting with this varnish.
 I got the legs off of Amazon because I didn’t have any left over wood. The legs are ok. They don’t quite look right on the table. But I couldn’t find anything better, and they were like $20.
One Comment