
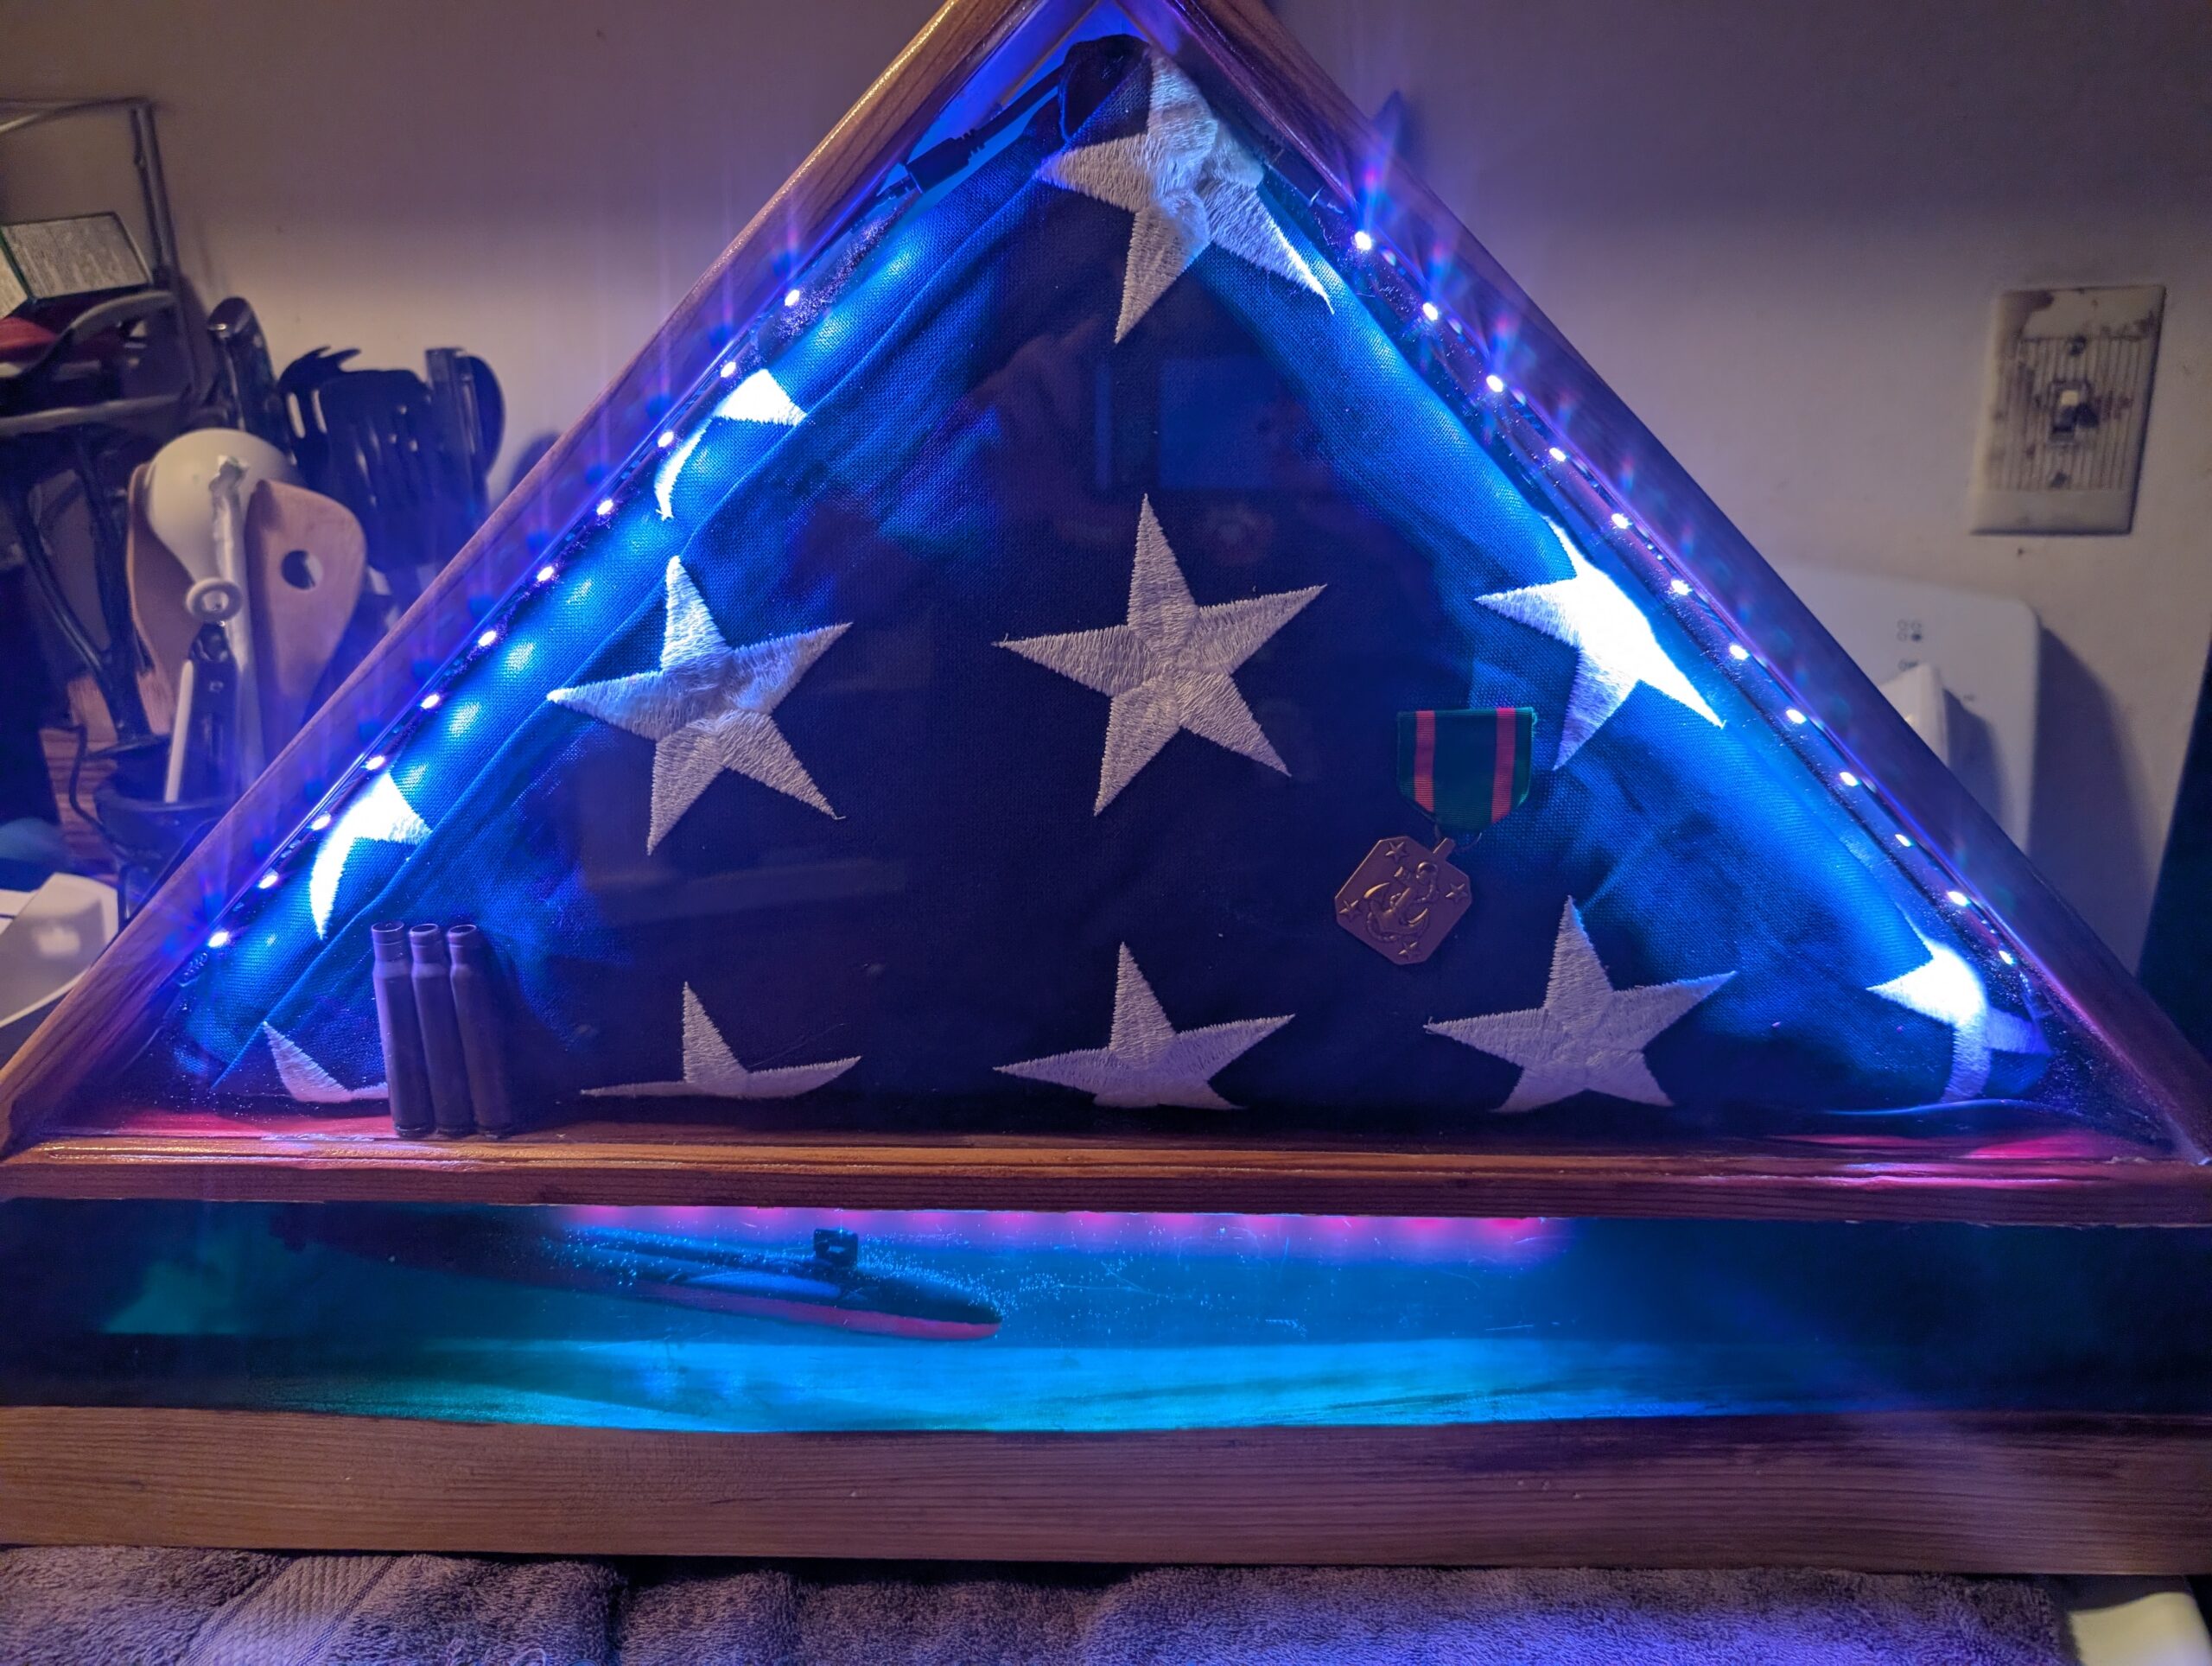
Flag Display
My fake dad was an amazing person. He was super duper smart. He could explain complex topics to people regardless of their intellectual level. He was a mentor, and a friend, and a great human being. Then he was taken away from us. In his youth, he was an electrical engineer in the navy and was a plank member on the USS Nevada nuclear submarine. He was very proud of his time in the navy. After his tour was over, he settled on the land, where he volunteered at the Pacific Science Center. In his free time, he loved table top games, especially war themed games. He enjoyed building and painting miniatures.
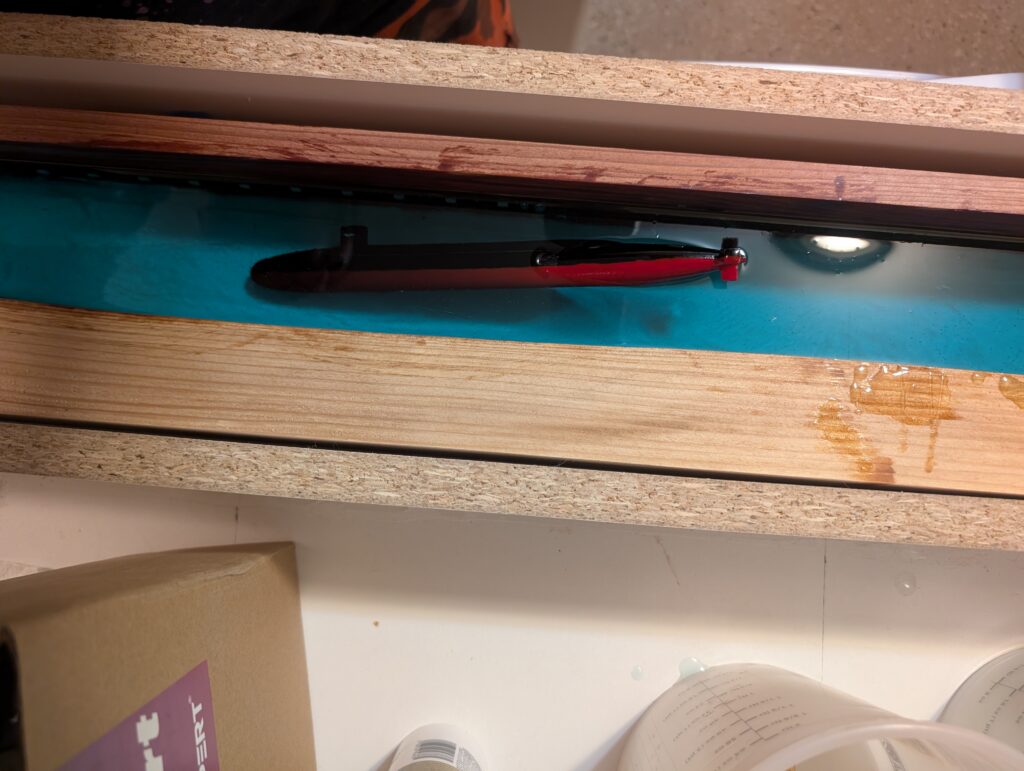
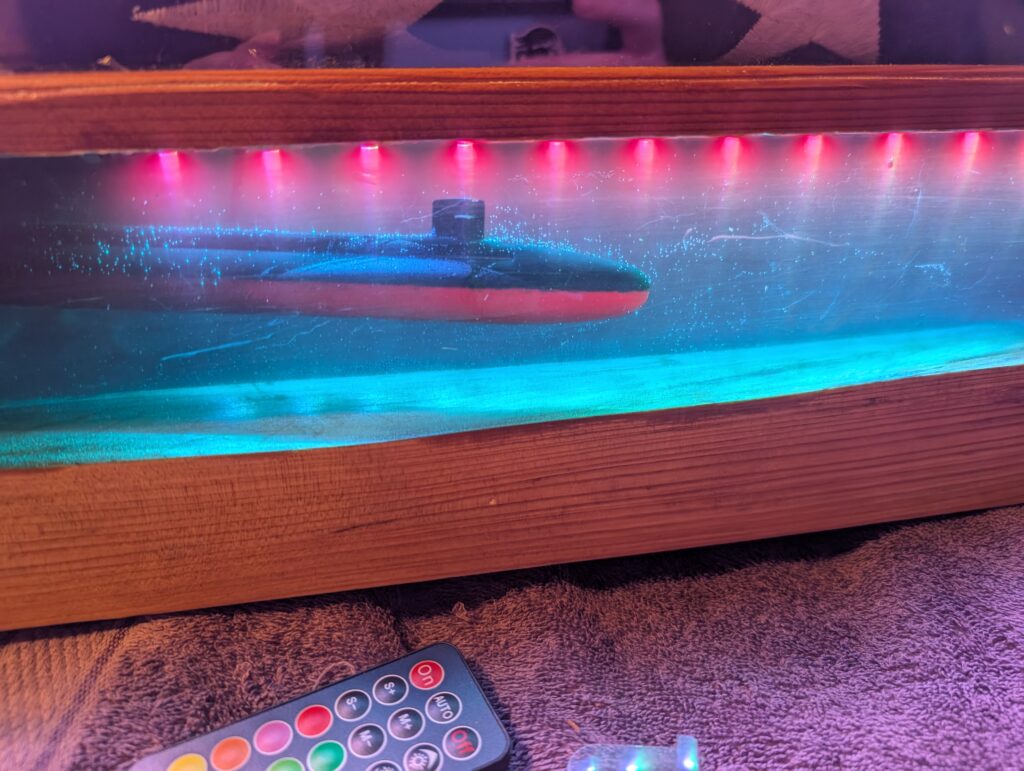
A few years ago, he died from cancer, way too young. I wanted to do something to memorialize him. I’m ok at woodworking, and I’m very used to working with epoxy, so I decided to make a flag display. To make it special, my fake mom gave me a miniature model of his old submarine that he made and painted. I inlaid that in epoxy as the base of the flag display. I’d use the live edge of the wood to look like the ocean floor.
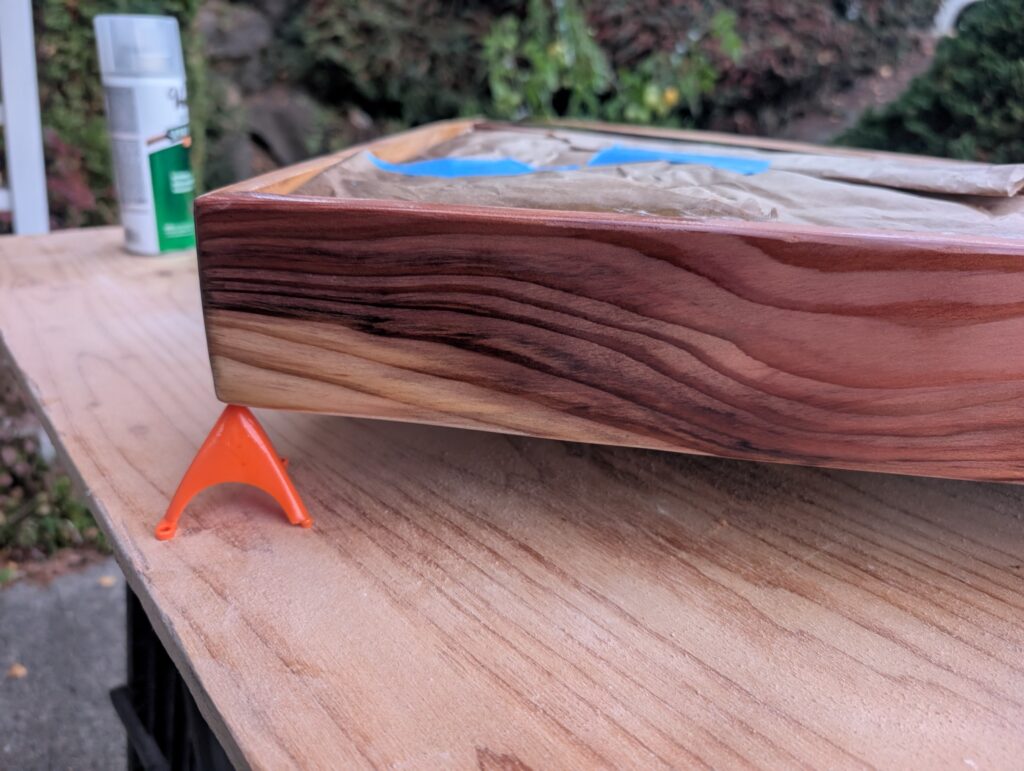
I had started working on this years ago, but the first wood I got was pine. The issue is that I needed a thick (4 inches) slab, and most people don’t sell those, especially when it’s a half slab, and only 3 feet long. Pine was all I could find. I was going to try Sho Sugi Ban, where you burn the wood, so that the grain is more dark, and then stain the wood around it. It’s a really cool idea. The issue was that there’s a skill aspect to it, and I didn’t have it. Some places were too dark. Some were too light. It looked like… really flat firewood.
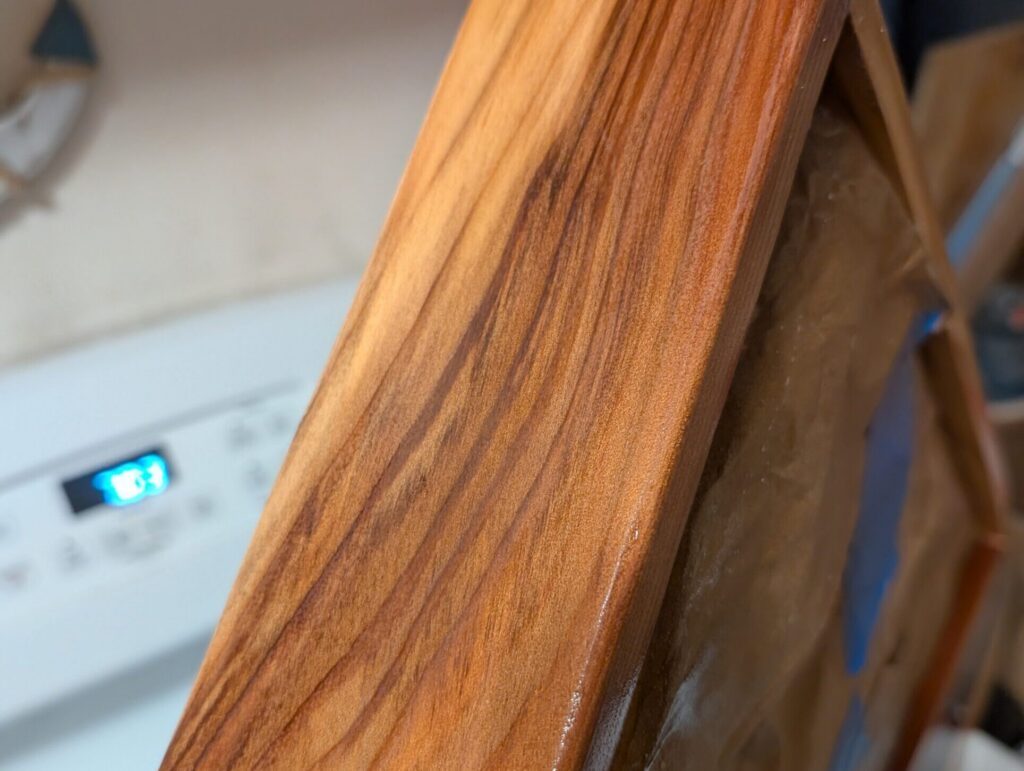
I was frustrated. I had this really cool idea, but it wasn’t working out. While on my annual camping trip, I had a brilliant idea. Way back when I was 10, I came up to visit with my grandparents. We stopped in Mt. Shasta and got some redwood to make some stuff for my aunt and uncle (before I unofficially adopted them against their will). Wouldn’t it be cool if I got some redwood from the same lumber mill? Sort of bring things full circle. I wasn’t able to remember the lumber mill, but the idea was neat, so I found someone on Craig’s List who was willing to sell me a thiccc half slab of redwood. It was far more wood than I needed, so I built a small coffee table, too.
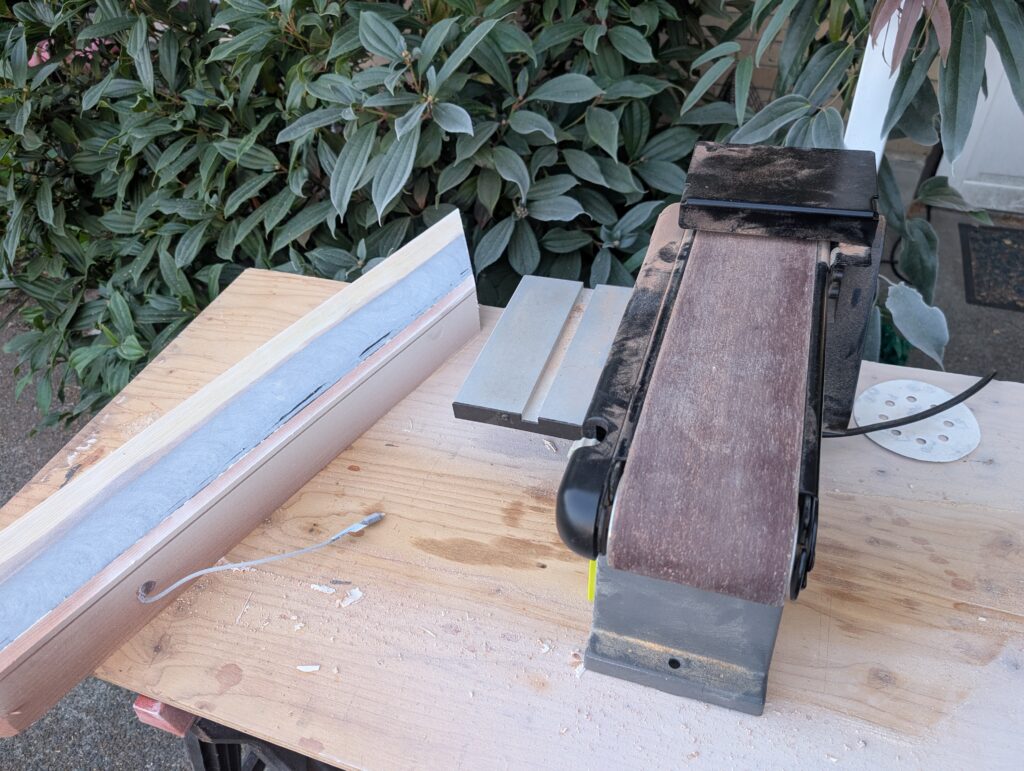
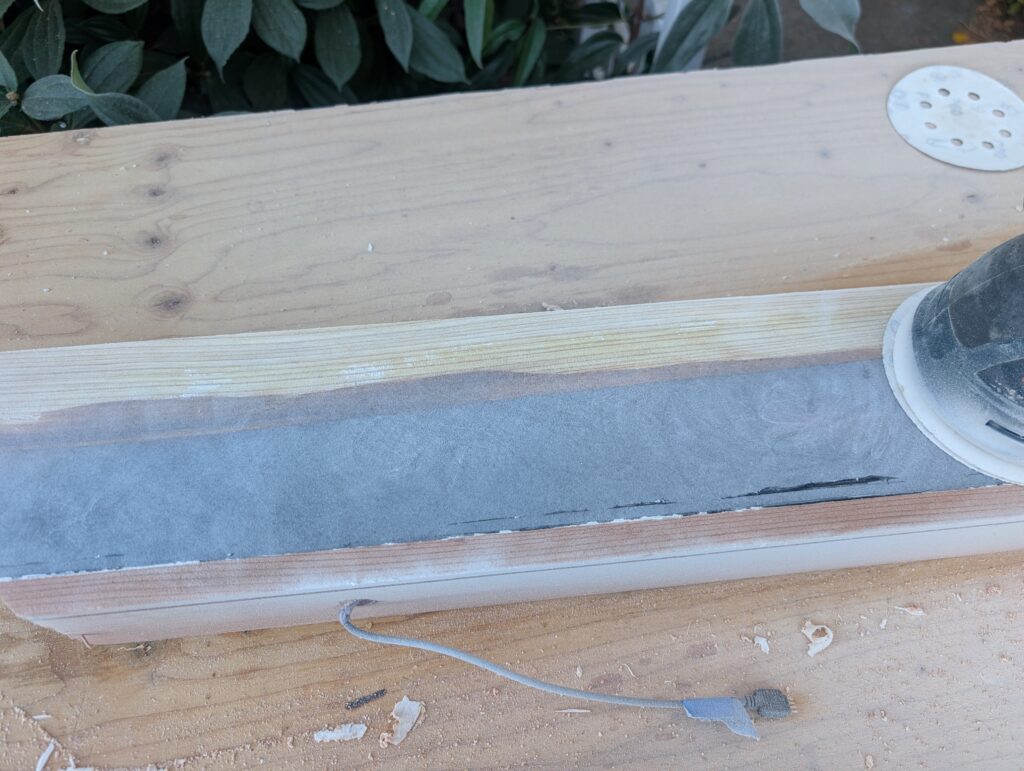
Now let’s get into it. First, I went to IsGood Woodworks. I had them plane and sand it with the wide belt sander to 120 grit. At this point, it was down to 3.5 inches thick. Then they sliced off a 3ish inch part of the live edge. That will be the “ocean floor”. Next, three slices were taken off that were 3/4 inch thick. This just happened to be where the heartwood met the sap wood. This is what caused them to look so amazing later. The rest was cut into 1 inch slices that made the coffee table.
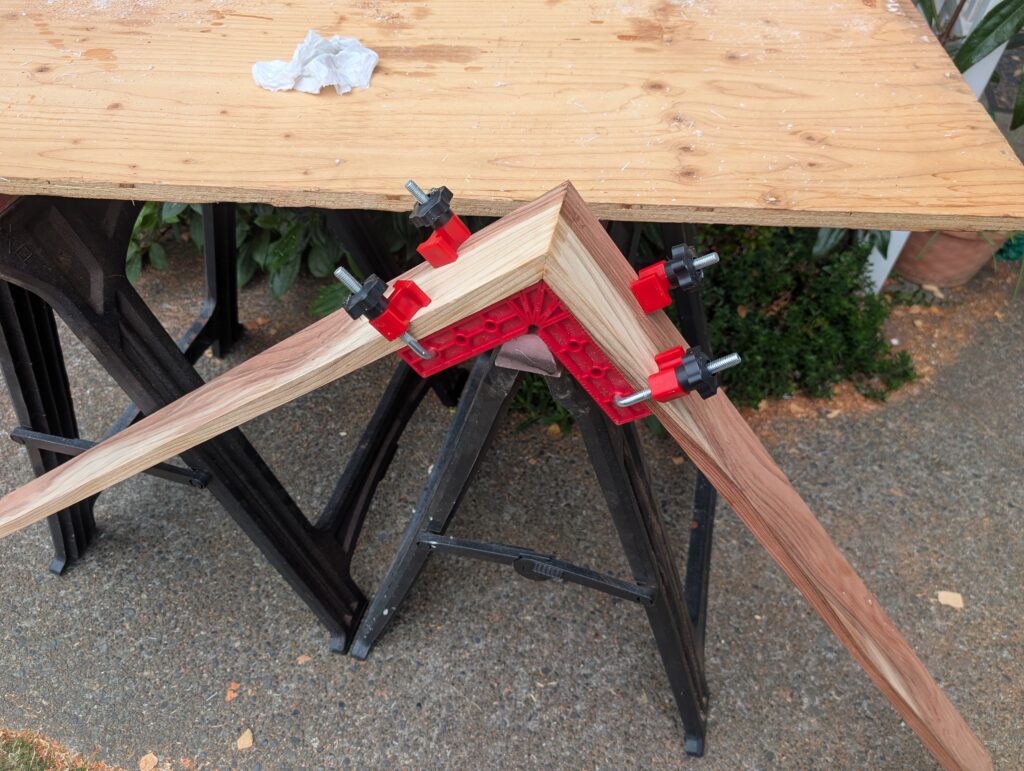
 The three smaller slices will be the triangle around the flag. I needed a slot in all three that was the same distance from the edge, to fit a piece of acrylic. I ran them through the table saw.
It took me like 45 minutes to dig the saw out and 45 minutes to put it back, all for like 5 minutes of cutting.
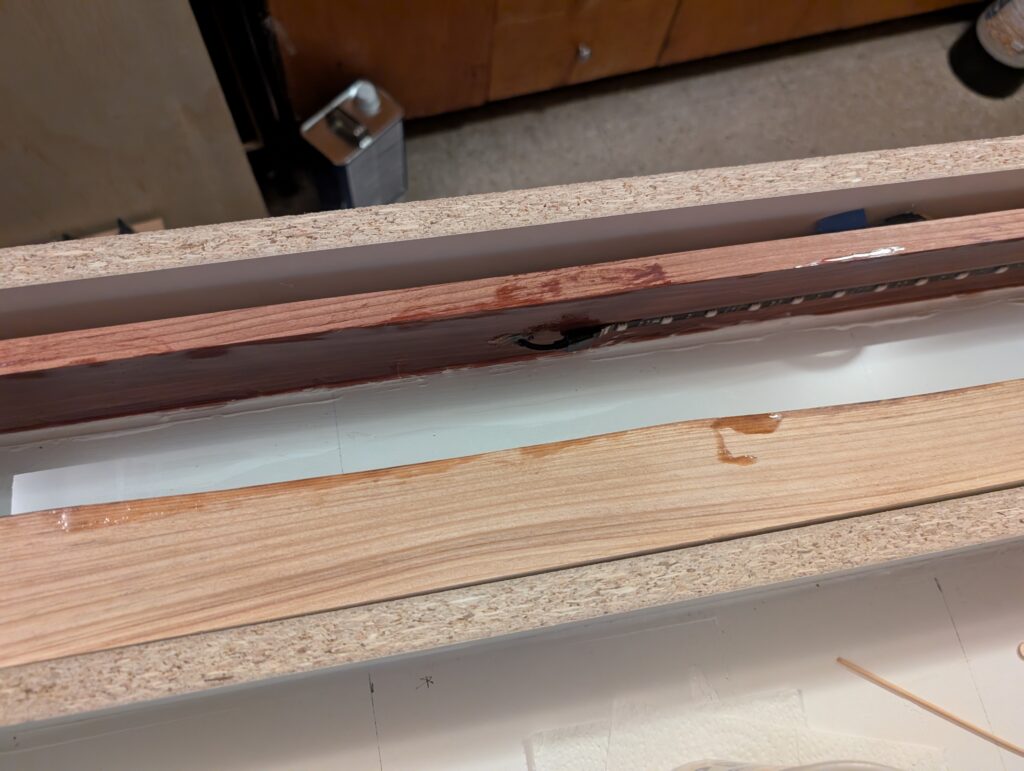
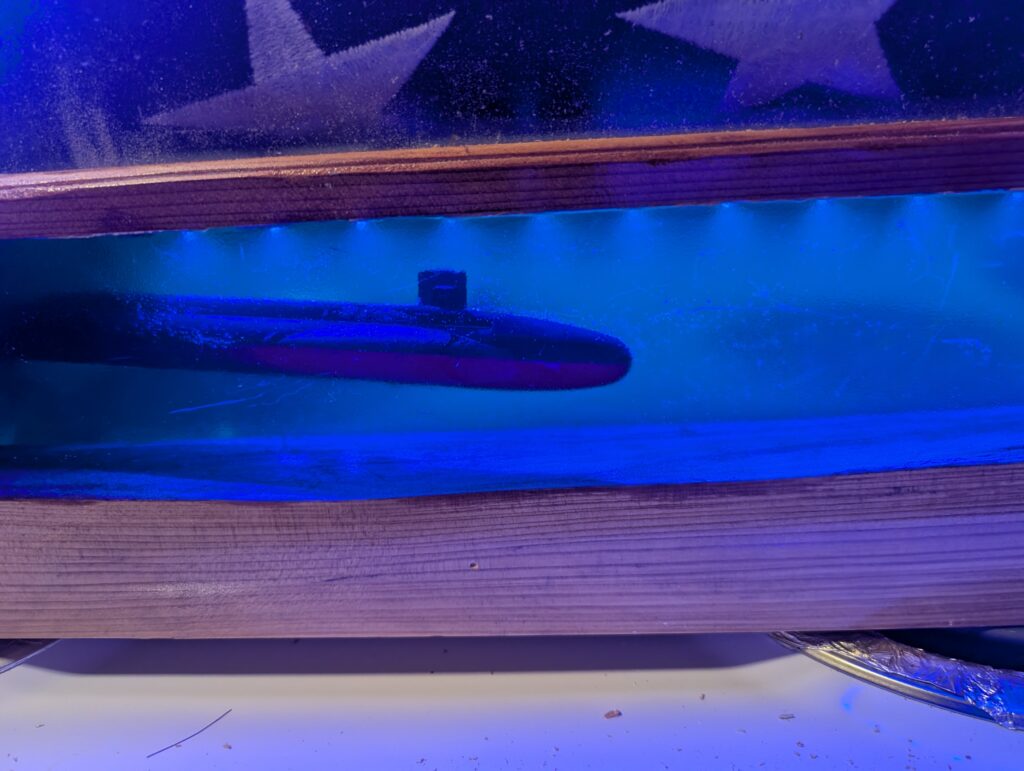
I picked the two prettiest pieces. They’ll be the outside edges. The third one will be the… ummm… “sky?” of the epoxy. I drilled a hole in that one to fit an LED connector. I built a mold out of melamine. I didn’t take any pictures of this, but it’s just a box that epoxy won’t stick to. I used silicone to hold the wood in place and to prevent leaks.
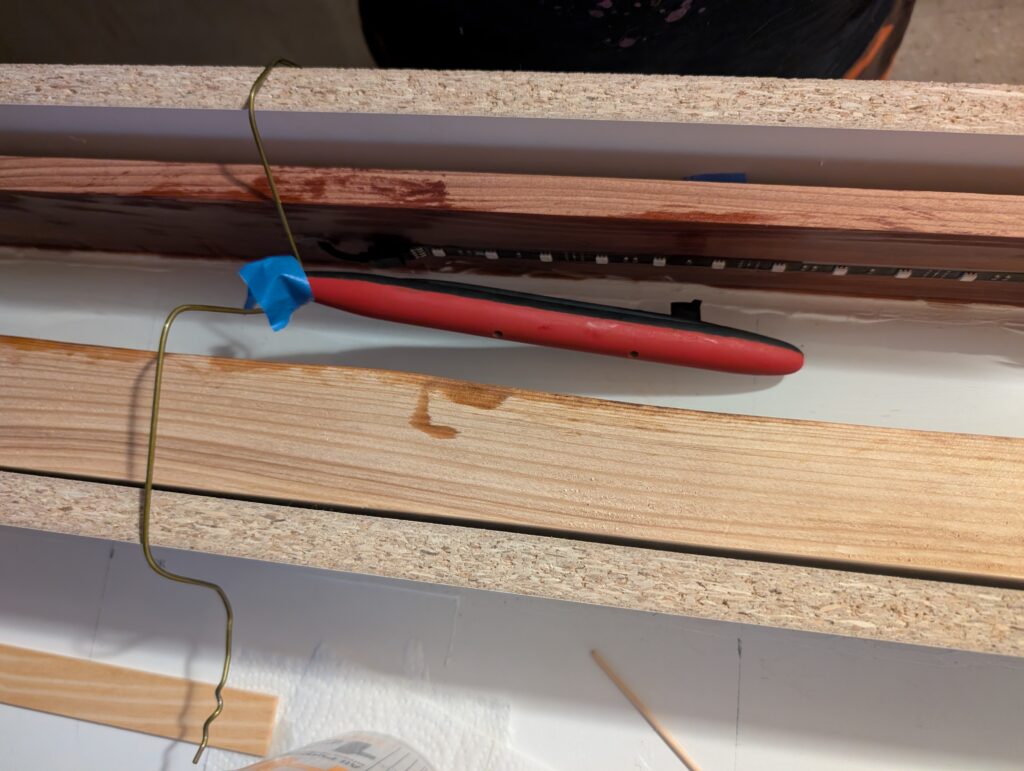
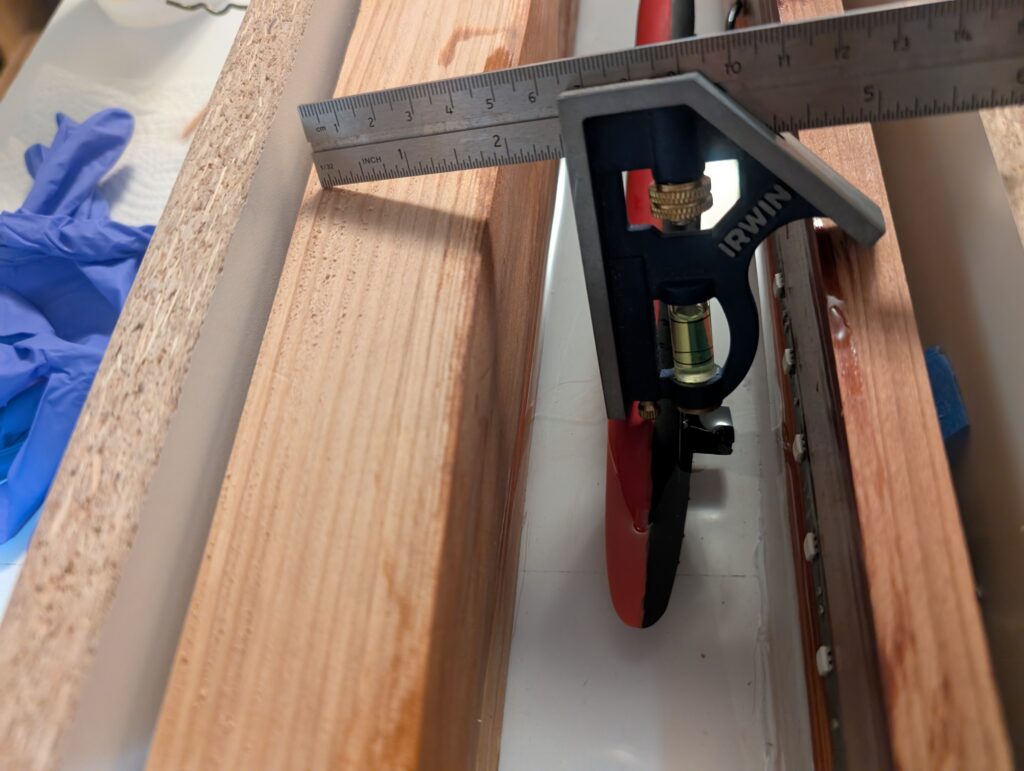
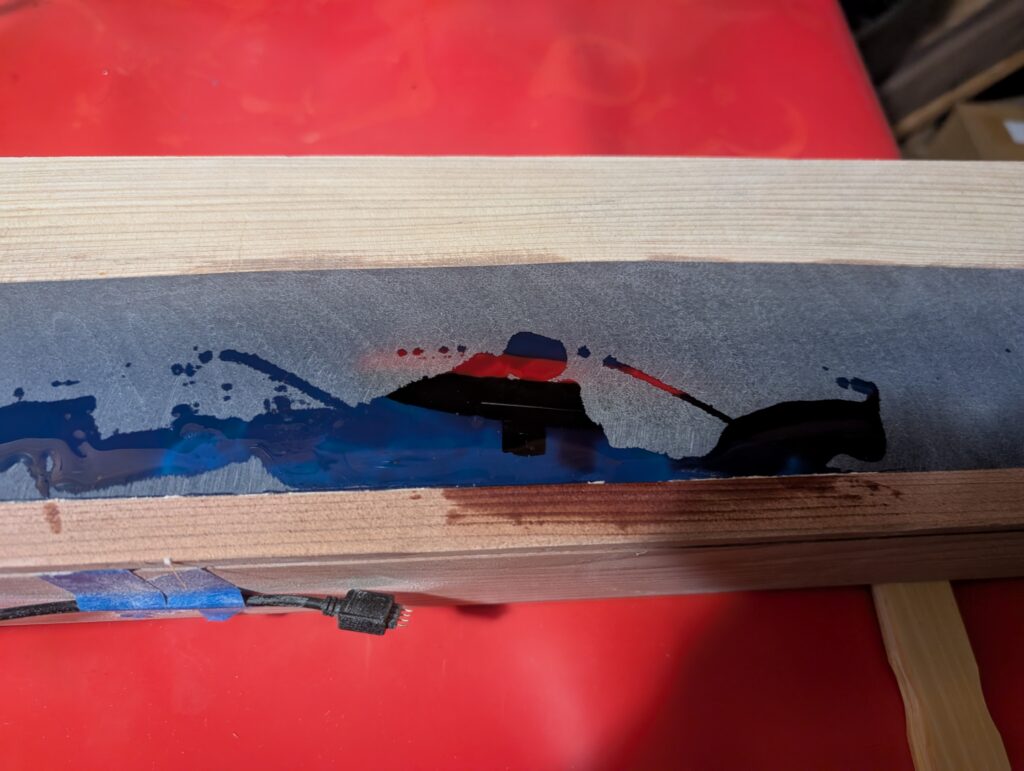
I made a mistake at this point, but I didn’t realize it until I had poured the first layer of epoxy. I put the slot side on the bottom of the mold instead of the top. That wasn’t a super big deal, but it meant I had to remember that the top of the mold was the BACK of the flag display now. I poured one layer of clear epoxy that was maybe 1/4 inch thick. That was mainly just to hold everything together, and make sure the submarine didn’t poke out when it came to sanding later. Once that was cured, I added the submarine. I wanted it to be on an angle, so it looked like the sub was coming towards you. I had to get creative with that. I used an old hanger to hold the aft up. But the submarine kept floating to the top of the epoxy. I guess it really was a submarine. I used a square to hold the bow into the epoxy. I think this layer was an inch thick. It held the sub in place.
Once that was cured, I removed the hanger and square and then started adding layers of blue epoxy. The dye I got was very powerful, so it was like 2 drops for 52 oz of epoxy.
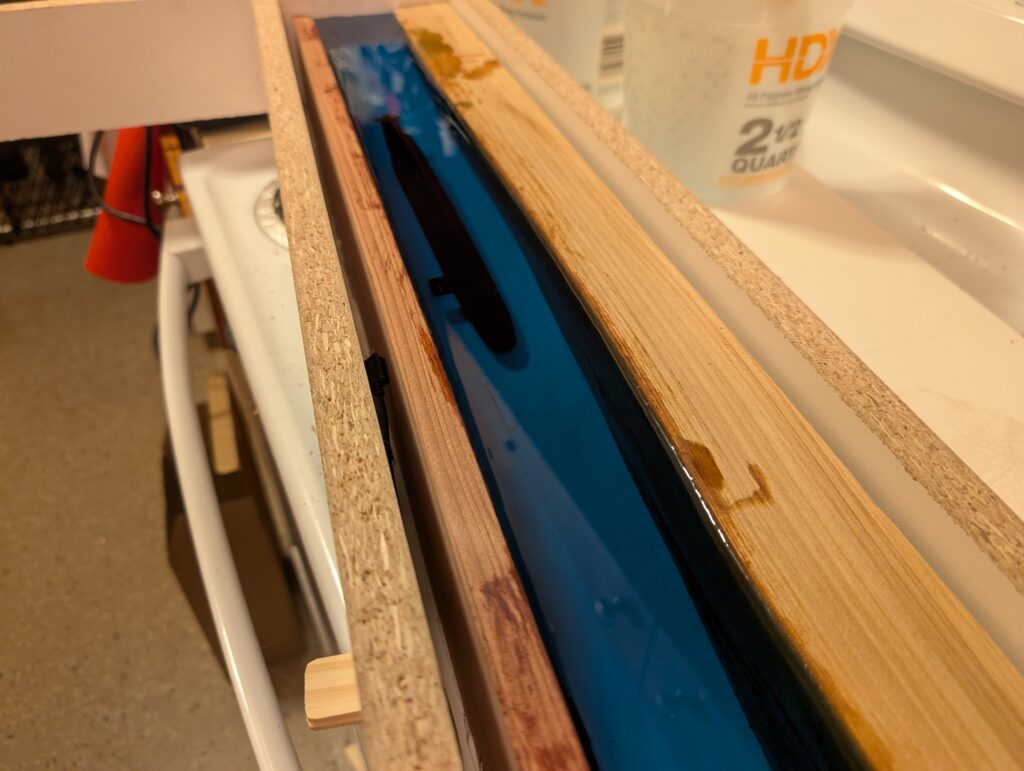
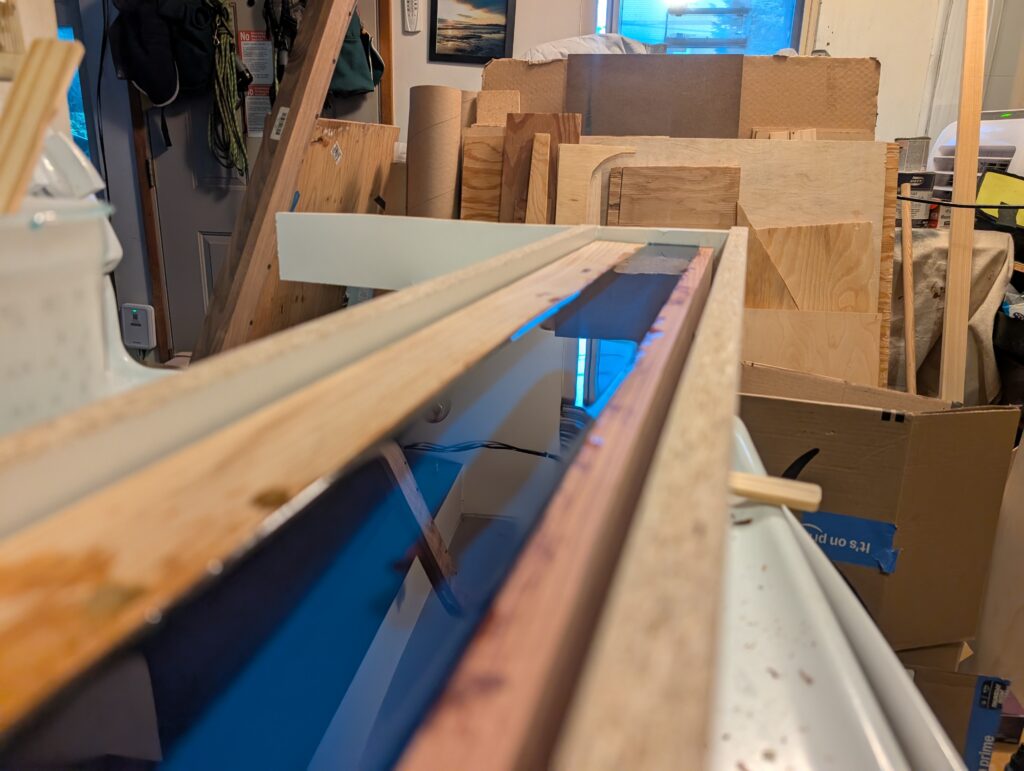
Once that was cured, I pulled it out of the mold, and began sanding. Well, first I had to remove all the silicone. Then lots and lots of sanding. So much sanding. Even though the mold was level, the wood wasn’t, so I had high and low spots. It wasn’t worth the money to go back to IsGood to go back through the wide belt sander, so I did it myself. I did try using my tabletop sander, but it was difficult. I wouldn’t be able to see what I was sanding, plus the wood and epoxy at this point weigh like 15 lbs.
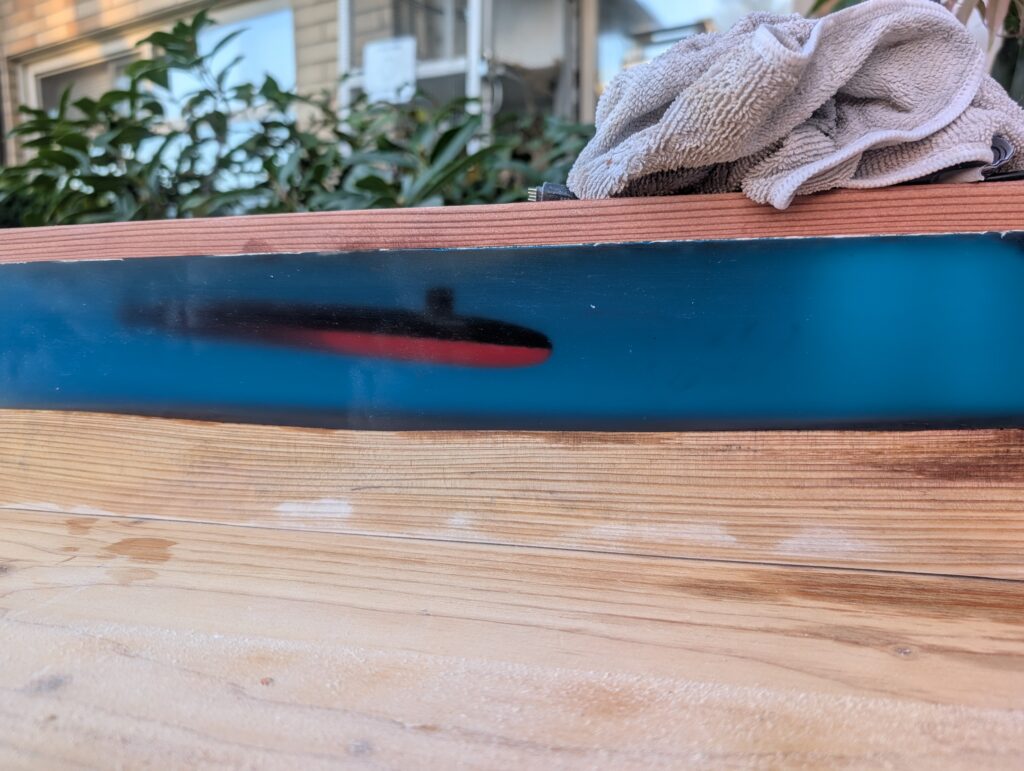
I had to go back and fill a few small gaps and air bubbles, but I didn’t need to put it back in the mold for that. Then I sanded that smooth, as well.
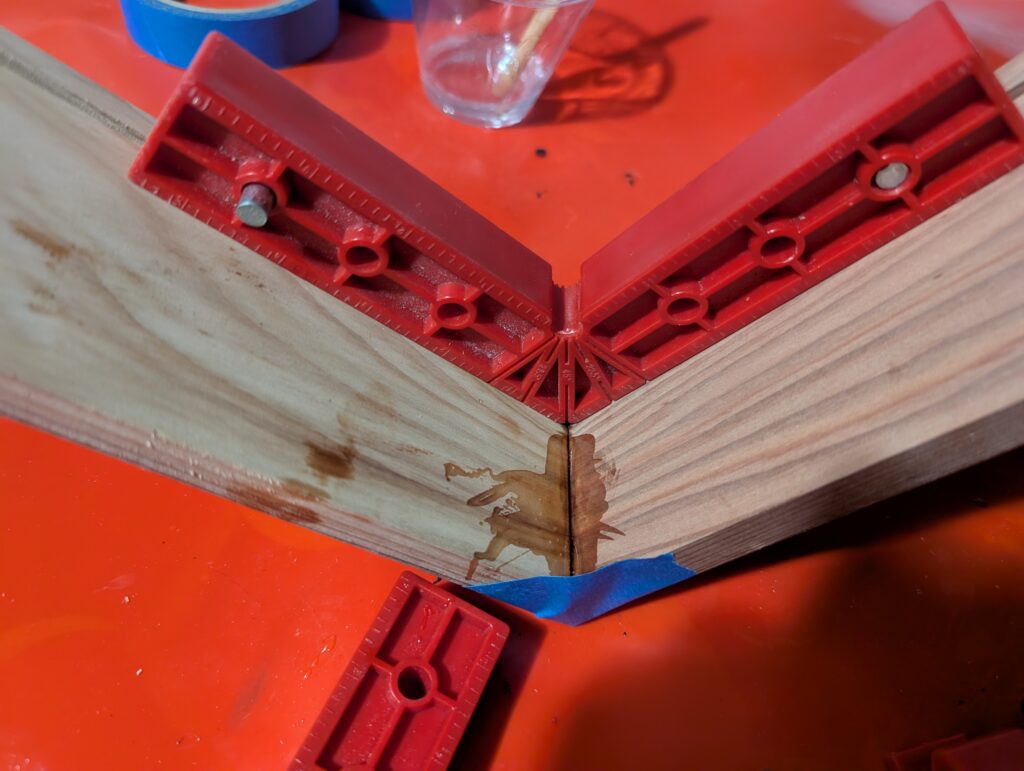
Next up, it was time for the upper triangle. I sanded them up to 400 grit, and then cut some 45 miters on them. Gluing them together was actually more frustrating than you’d expect. Originally I tried epoxy. But the wood soaked up most of it, so the bond didn’t work. I tried again, but with some gorilla glue in spots. That lasted like a week, and then when I brought it outside for sanding, it came apart. Finally, I cut the old corner off, and gave myself a fresh miter. Then I used good old fashioned wood glue. That worked perfectly. Keep it simple, stupid. Also, corner clamps are awesome.
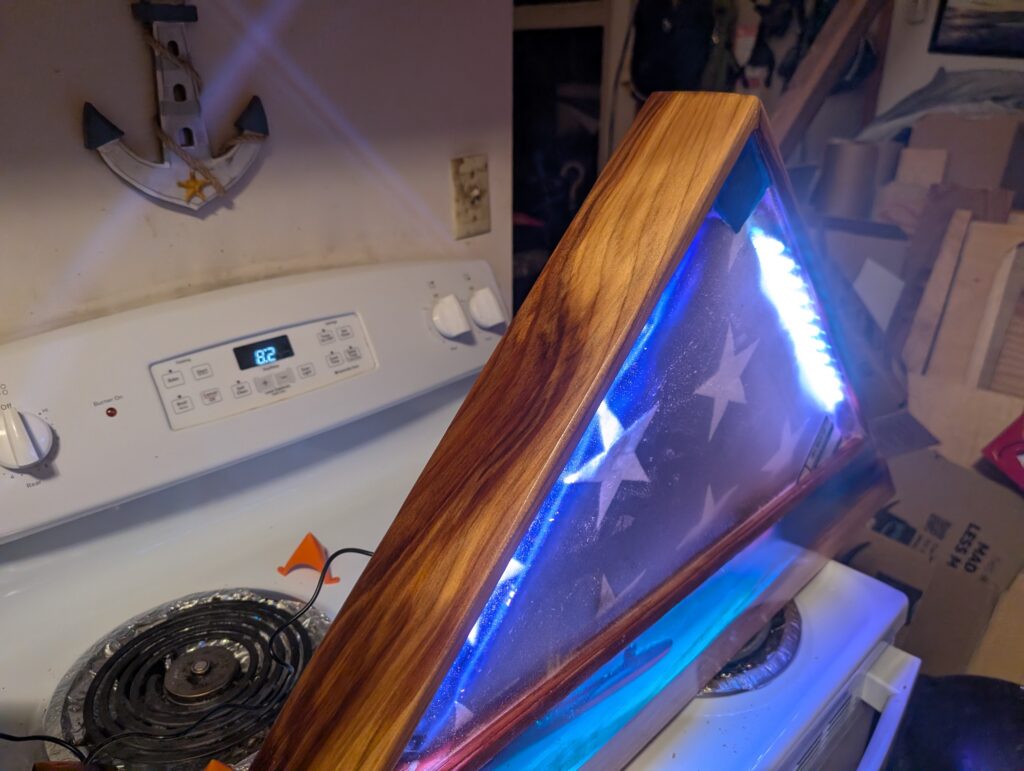
Once it was finally secure, I gave everything a very small 1/8 inch roundover. This wasn’t a great idea, because the redwood is a very soft wood, and it caused some chipout. I sanded the inside and the top of the base, to 600 grit. I figured it’d be smarter to finish the inside now, while it’s still apart. Like the coffee table, I’m using Spar Urethane varnish, but this time, I decided to give the spray version a try. It’s so much easier to work with. I was able to apply 3 thin coats each day. No runs. No bubbles. Easy. So I did that for the inside, where the flag will be, because once I put it together, it would be super difficult. I did have to keep the LED cable out of the way, so I wrapped it in popsicle sticks, to make it “stick” up. This worked surprisingly well.
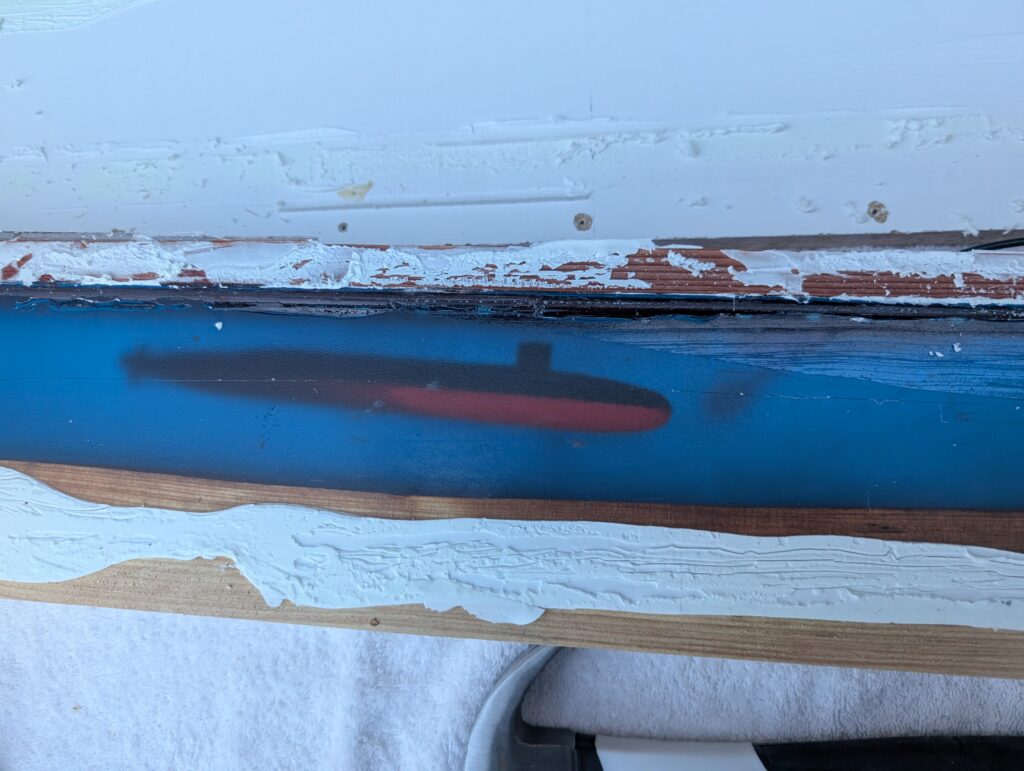
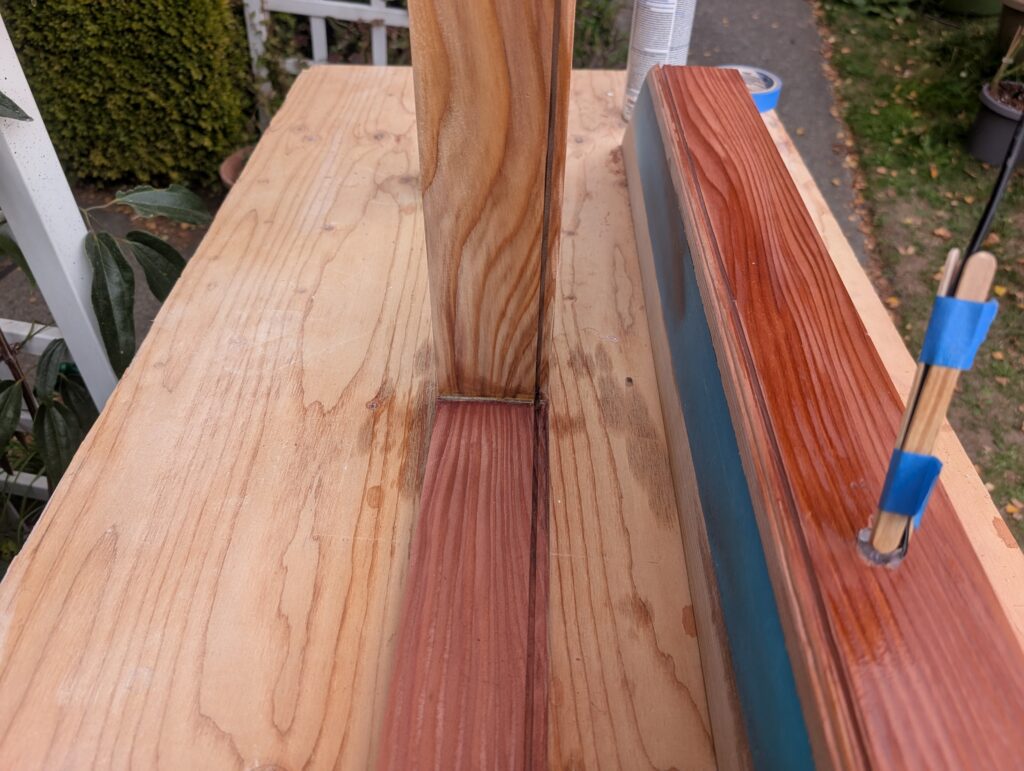
 Time to start cutting everything down to size. At this point, each side is 3 feet long. Way more than I need. I set the flag in place, and made sure each of the… vertical sides were evenly spaced from the base. Then drew a line on each side. By now, after the sanding, the base was 3 inches thick, which fit through my chop saw. I kept the corners for later.
Then I put everything back in place, and marked where to cut the extra wood from the sides, and cut those.
 I did a test fit, and traced out the spot for the backing. I had just barely not enough redwood for it, so I ended up using a piece of 1/4 plywood and painting it white. It will almost never be visible, so that’s fine. I didn’t take any photos, but imagine a white triangle. With that done, I measured the depth of the slots for the acrylic. I added that amount all around the backing then cut the acrylic to that. I did a test fit again. It took some wiggling, but I got everything in place.
 The glueup was super nerve wracking. I took the corners of the base and rotated them so I could clamp them. But when I tightened them, it started to pull the corners away from each other. So I used another clamp to add tension and hold them in place. I learned from my previous mistake, and skipped straight to wood glue.

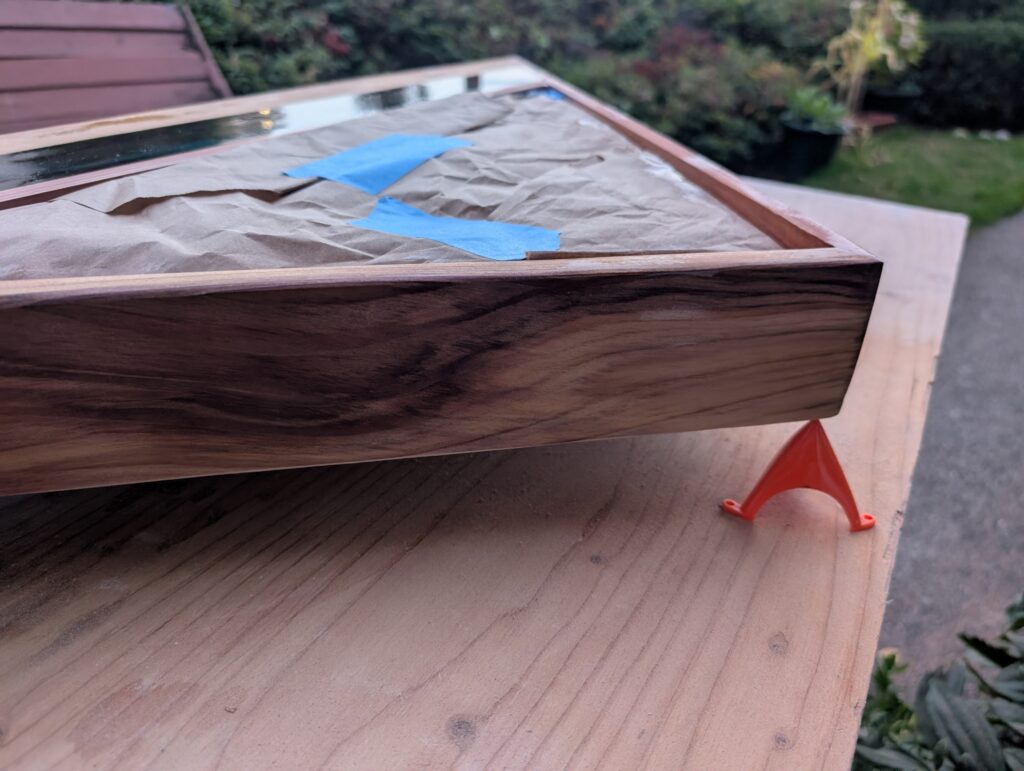
Time for final sanding. I got everything up to 600 grit. I rounded over the outer edges and the top corner. I kept the bottom edges straight, because I thought they looked better. I used the white backing (wrapped in paper) to fill the area so I didn’t get varnish on the acrylic. Then I started applying varnish. It was at this point that I started getting proud of my work. I mean, look at that wood. These photos are after the first coat. I started with the back, so if I messed up, I’d be able to fix it, or it would be hidden. But everything turned out so well. I did 6 or 7 coats on the back and sides. Then I flipped it over and did the same on the front.

I installed the rest of the LEDs on the inside of the triangle, right at the edge where the acrylic is. I drilled a small hole in the back of the white triangle for the power cord.
Then I sanded everything all the way up to 10000 grit. I decided to polish the epoxy, because sanding the varnish left some very visible scratch marks.
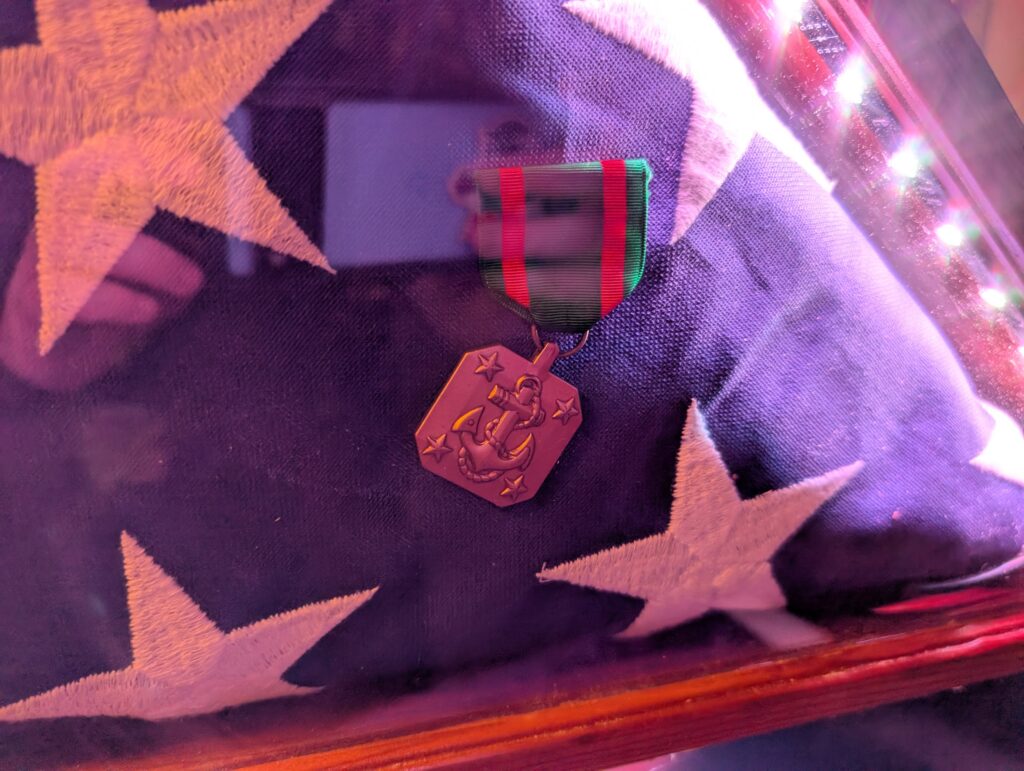
My fake dad had earned a medal, so I pinned that to the flag, and hot glued some of the bullets from the 21 gun salute. Obviously, I also put the flag in. The pin got sort of on an angle, so I had to take the back off again, and fix it. There are like 10 screws holding it in place, so that was fun. The LEDs are color changeable via a remote. I wish they weren’t so focused. Maybe I’ll add some sort of diffuser later. I can’t do that with the one in the “ocean” because of the epoxy, but that one’s not as noticeable.
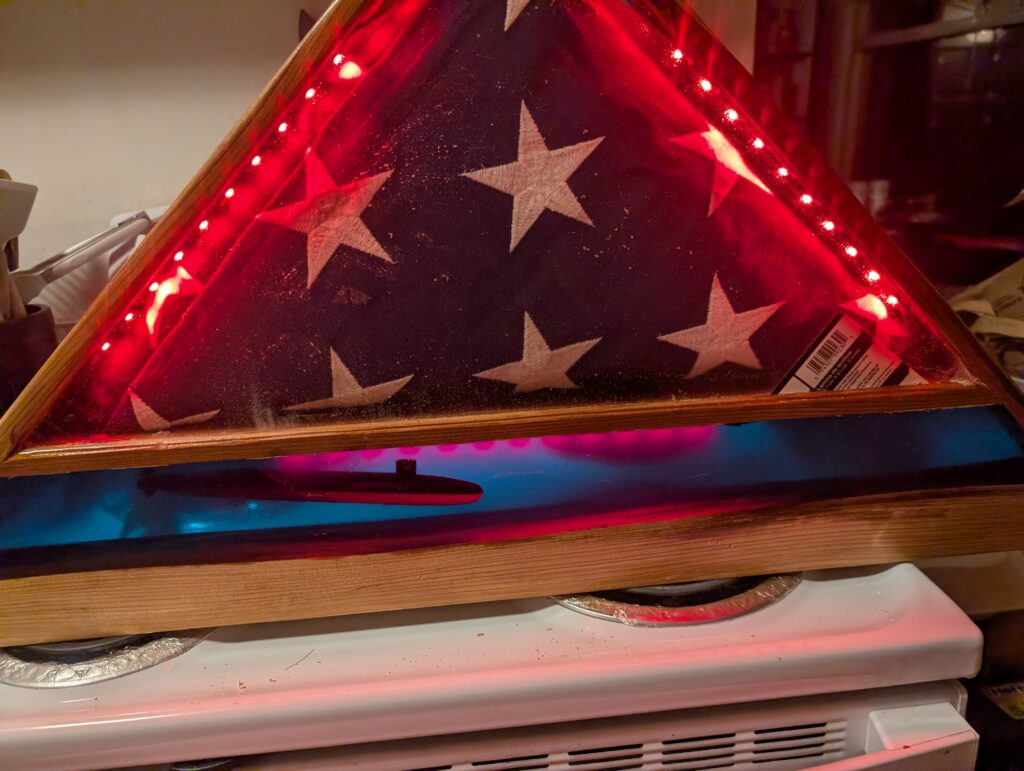

Finally, after like 3 years, I finished this project. I think it looks amazing. It’s one of the few times, I actually feel proud of something I made. I think my fake dad would have liked it.
One Comment